Prusa Mini Enclosure
Published: 2021-12-08 (updated 2021-12-15)
I've been wanting an enclosure for my Prusa Mini for a while. When my friend Martin Dederer offered to build one, if I send him a design, that offer was hard to pass up.
Here's the end result:
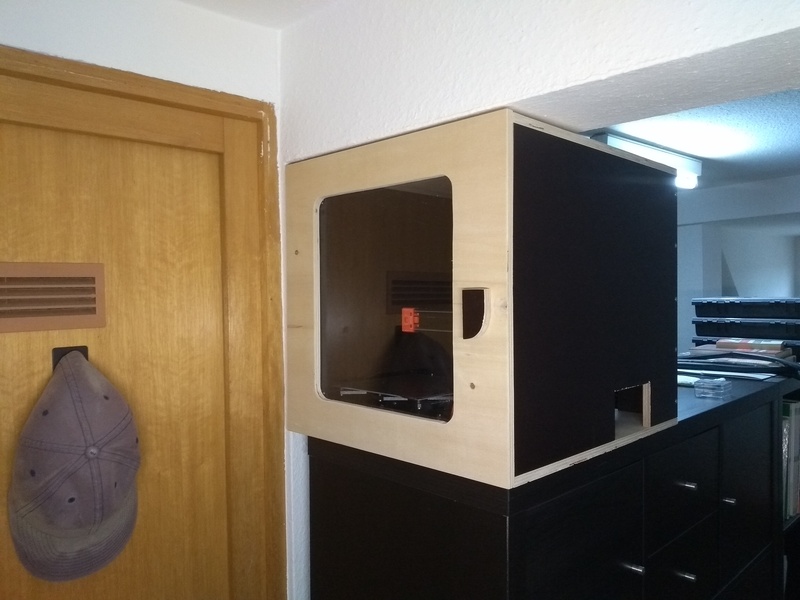
As you can see, the enclosure fits into its place very precisely. The front door has a window, so I can see what's going on inside. Near the back of the right wall, you can see an access port for the power switch, USB ports, and filament.
I plan to print a cover for the access port, with a hole to let the filament through, to further insulate the inside. See below for more thoughts on this and other future improvements.

Here's the view from the back-right. You also see the back access port for power and network cables.
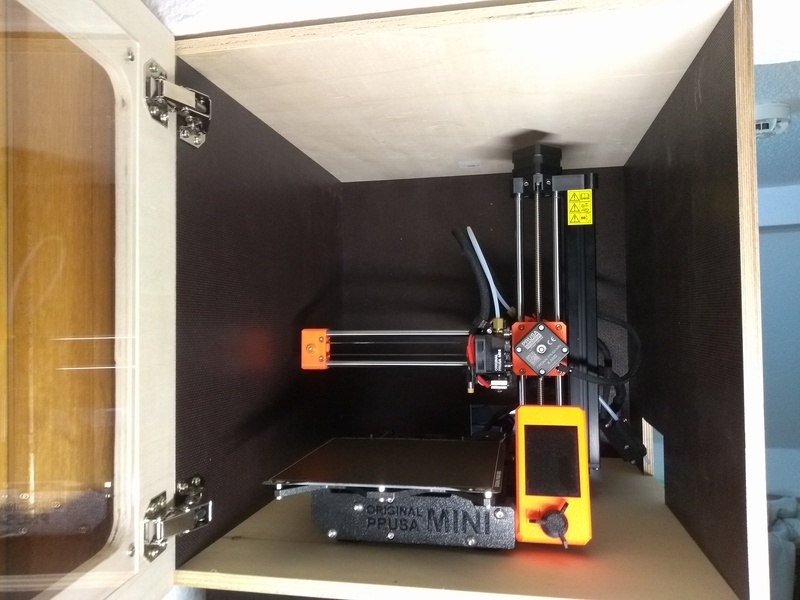
And here's what it looks like inside. I tried to not waste any space, while leaving enough room to comfortably handle the printer.
Design
I used libfive Studio to build a CAD model. Mainly because it seemed interesting and I wanted to try it.
Here's the front view of the model. I left out the door, as I didn't want to overconstrain the build with unnecessary design decisions.
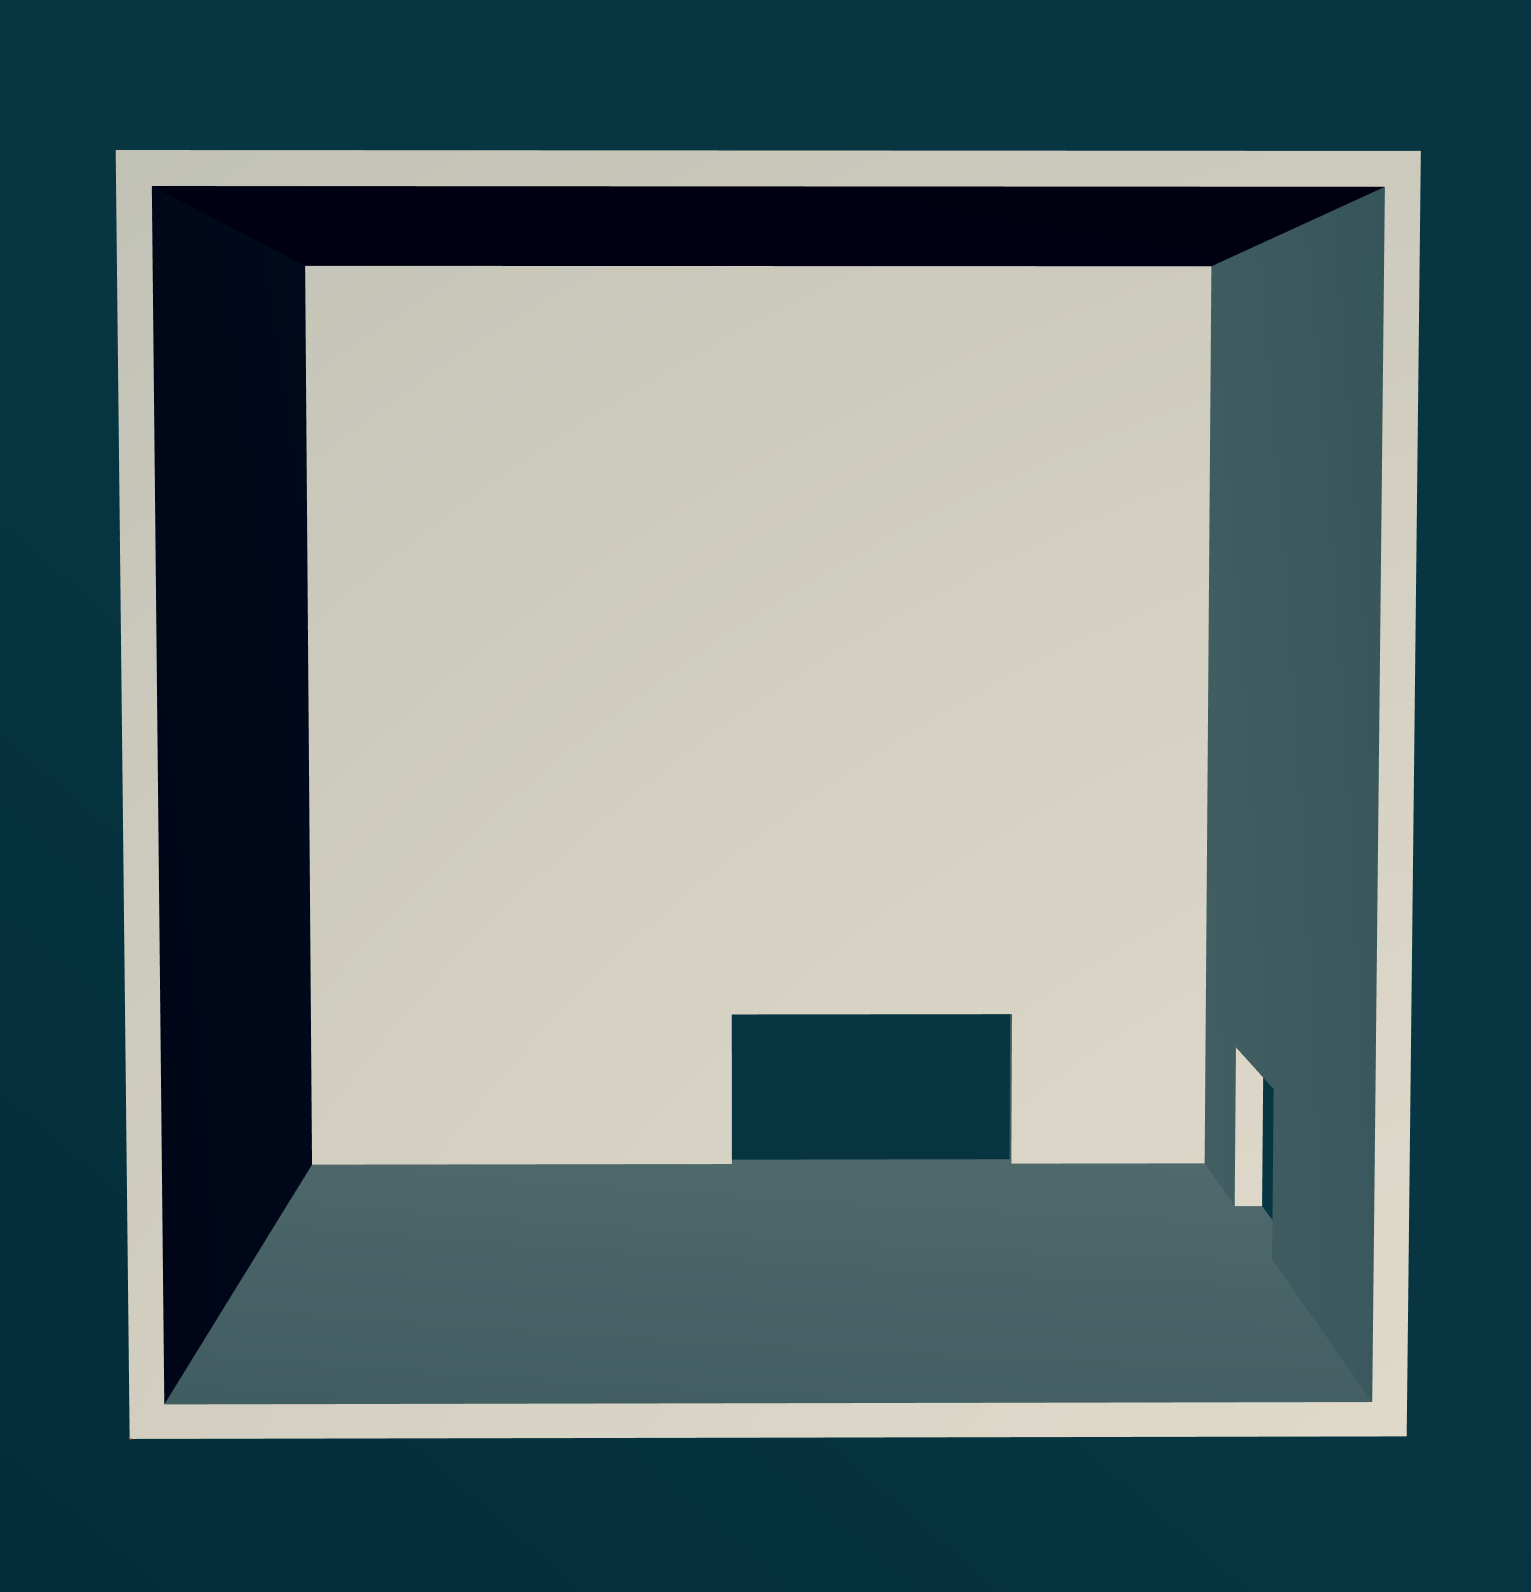
A CAD model wouldn't have been necessary for a build of this complexity, but I found the process of creating it very beneficial. It helped me get clarity on the internal and external dimensions, which, seeing how snugly the enclosure ended up fitting, was very important.
libfive Studio is a Code-CAD tool, and I added extensive comments to explain my design intent, which helped a whole lot to ensure the dimensions were correct (and hopefully will help anyone who's interested in understanding how I came up with them).
The whole design is open source and publicly available on GitHub. The CAD model itself is defined in model/prusa-mini-enclosure.py within that repository.
Future Extensions
This is only the first version. I have ideas for several extensions and modifications:
- Make the power switch and USB port accessible from the front, using extensions from levendig|dsgn ([1], [2], [3]). This means that access through the right port will not be required, except for maintenance operations.
- Print panels that fit over the access ports, with holes to let cables and filament through. This will further enclose the printer, making the enclosure more effective.
- Add lighting on the inside. There's already not a whole lot of light where the printer stands, and the enclosure only made that worse.
- Add temperature monitoring. I'd like to be able to monitor the temperature via a display on the outside. Possibly via two sensors: one at the top, one at the bottom. Knowing the temperature would be interesting, could help debug print issues, or could increase the reliability when printing finicky materials.
- Add automatic fire extinguisher. There are products that contain fire-extinguishing powder and explode when exposed to flame. If worse comes to worst, this will certainly be great to have.
- Somehow integrate the power supply, possibly by adding some kind of shelf to the outside of the back wall. This would make moving the enclosure easier, and might also be more aesthetically pleasing. Right now, the power supply just sits next to the enclosure.
- Somehow integrate the filament roll, again, possibly with a shelf on the back side. This would also have the advantage of making it easier to move the enclosure. It also provides an opportunity to enclose the filament roll, to protect it from dust and moisture.
- Move the display unit (then with the power switch and USB port integrated) outside of the enclosure. This would make it possible to control the printer without having to open the enclosure. But it would make it harder to move the printer outside of the enclosure for maintenance. I'm not sure about that one yet, but it's something I'd like to keep in mind.
- Add a camera. This would allow for monitoring prints remotely, debug what went wrong based on a recording, or streaming prints to others (for example when printing a part for someone else).