Notebook - Original Build
I have a notebook that I use almost daily. After watching a DiResta video or two about making notebooks, I was inspired to try my hand at creating one of my own. I had also wanted to try cork leather for a while, and this seemed like a great opportunity.
I'm currently using a Moleskine notebook (and have for years), with the following attributes:
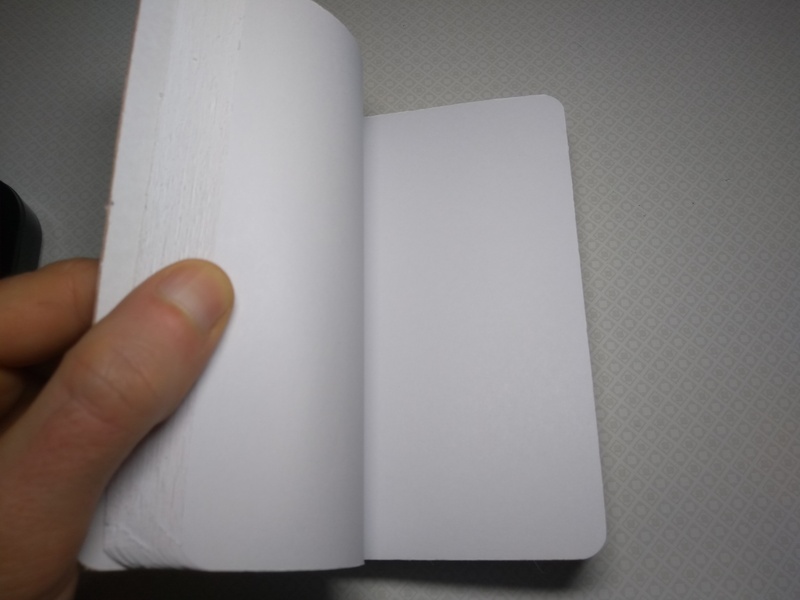
- Pocket-sized, a bit smaller than A6. That's large enough to be useful, and small enough to fit in my back pocket.
- Soft cover, as having a hard cover in my back pocket doesn't feel that great.
- Rounded corners, to further improve the back pocket feel.
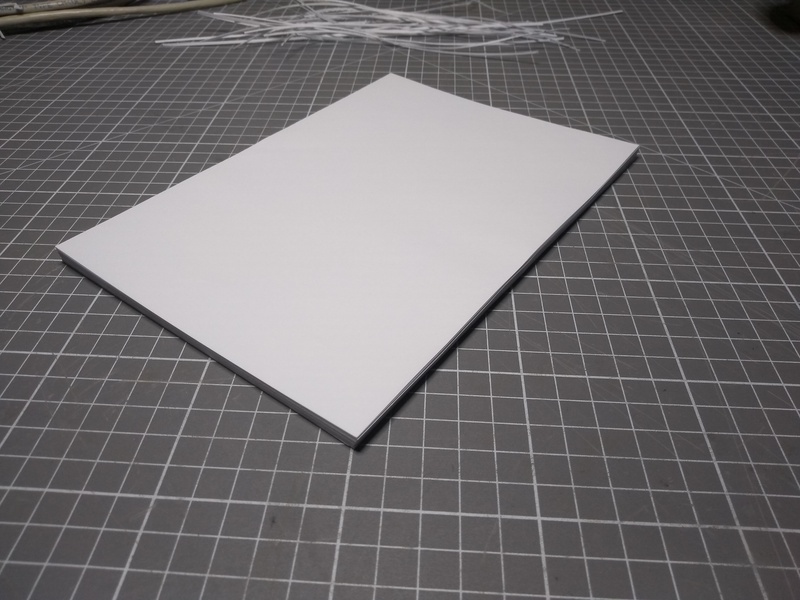
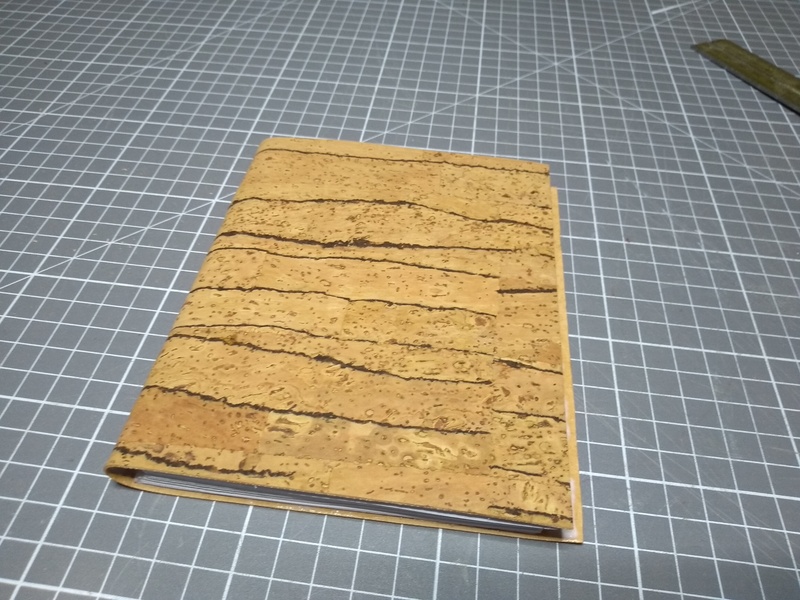
That is what I wanted to replicate with my own build. Here's the result.
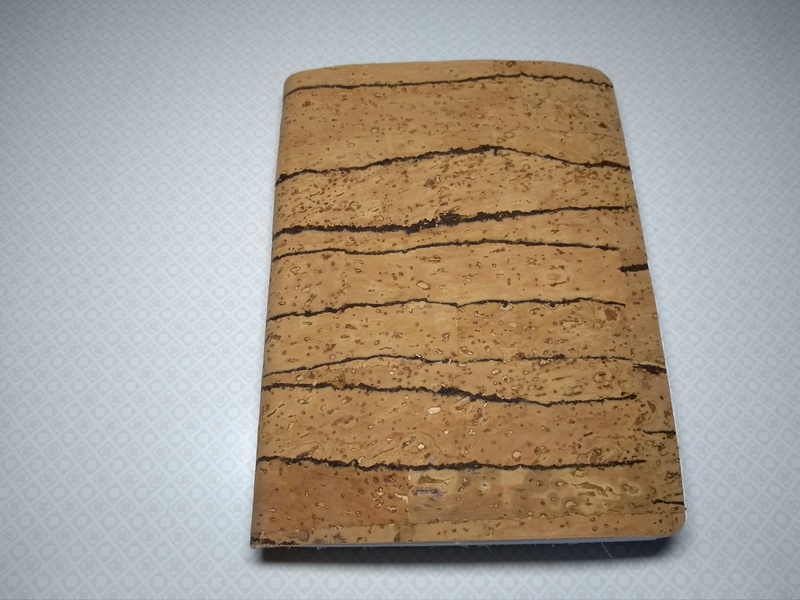
It's far from perfect, but I'm very happy with it. Especially for a first try.
I had planned this project for a while, but kept procrastinating. Beyond the attributes laid out above, there were still so many decisions to make and things to consider. I finally decided that enough was enough, and that I was going to just keep it simple for the first go:
- Just use printer paper. Probably not the best choice, but I already had it, and I figured it would do fine.
- Blank pages. This did simplify things, as I got to use printer paper and didn't have to care about perfect orientation of every page.
- No frills. My Moleskine notebooks have this flexible band, to keep the notebook closed, and a bookmark ribbon. Nice, but I can do without those.
- I decided to go for 192 pages, as that's the same number as my usual notebooks have. Seemed like a good number.
I would have preferred grid pattern paper, but figured I wouldn't be able to create something to replace my daily notebook anyway, on the first try. So I decided I would use the notebook mostly for sketches, for which the blank paper would work fine.
With those decisions made, I was finally ready to get started!
Tools
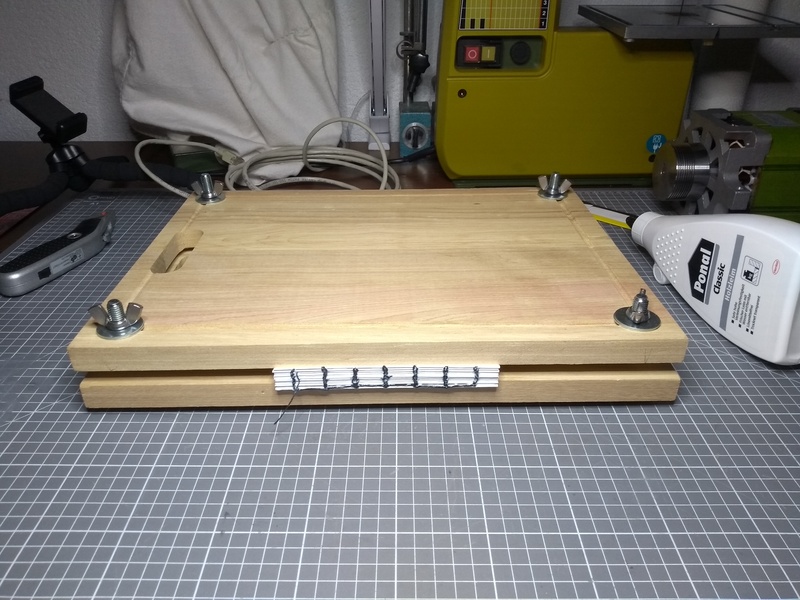
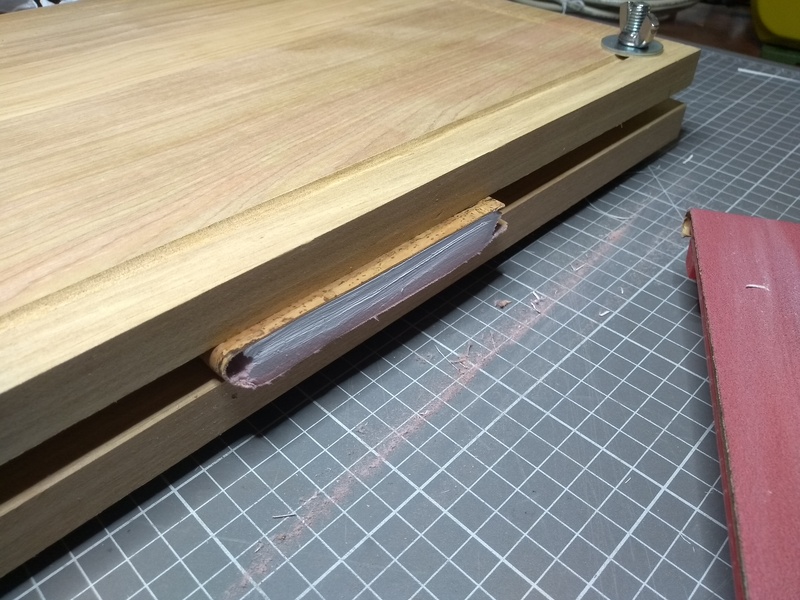
There were a few tools I needed. The only substantial one, which I decided to build myself, was a book press.
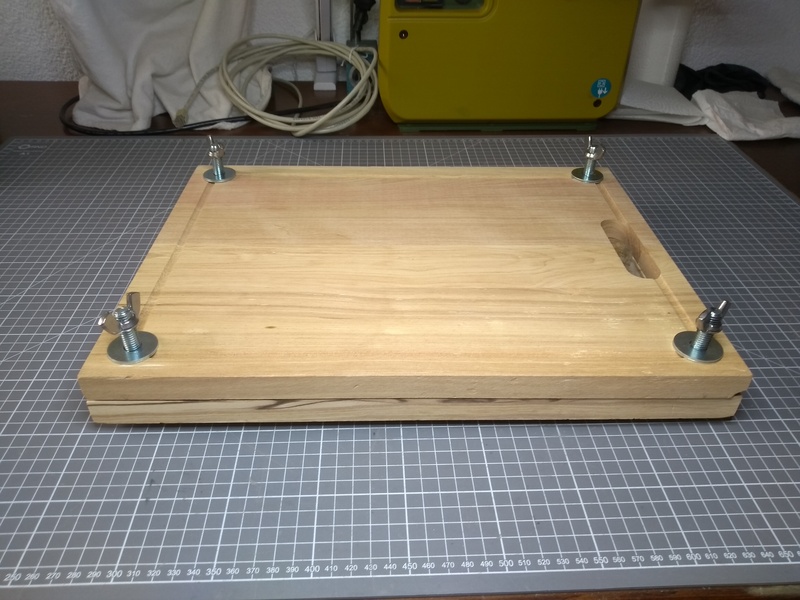
I adapted the concept from this video by Sea Lemon on YouTube. It didn't come out great, but it was cheap, and easy to do. The only real problem is, it's too big. I built this not only with the notebook in mind, but also with the idea that I might want to bind some ebooks I like, that aren't available to buy in paper form.
Figuring that since I can print A4 paper at home, I was going to need an A4-sized book press. Forgetting, of course, that I need to fold the paper to bind it as a book. So an A5-sized press would have been more than enough. Oh well.
Other than the book press, I only needed some small stuff, all of which I already has or ordered from Modulor:
- A knife
- A ruler
- An awl
- Bookbinding needles
- Sandpaper
- A corner punch for rounded corners
Materials
Like the tools, all of the materials required were pretty cheap and easily available:
- Paper: As explained above, I just decided to use printer paper.
- Binder's thread
- PVA glue
- Cork leather for the cover
The Build
The first step was to create a text block. I'd never done this before, so I just followed another video by Sea Lemon on YouTube.
Preparing the paper
First problem: I have A4 paper, but need (roughly) A5-sized paper. Solution: Fold them, cut the folded end off.
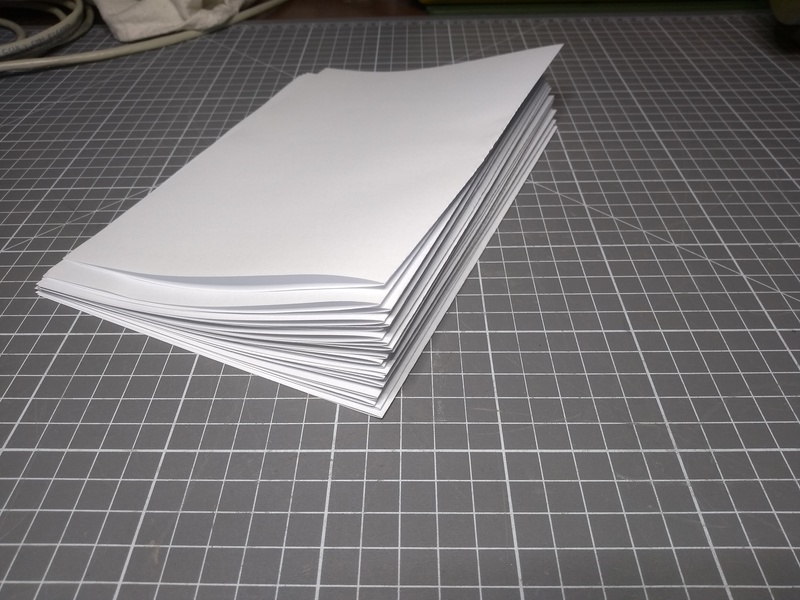
Repeating that a bunch of times gave me a nice stack of A5-ish paper.
Next, I folded it and stacked it in groups of 4.
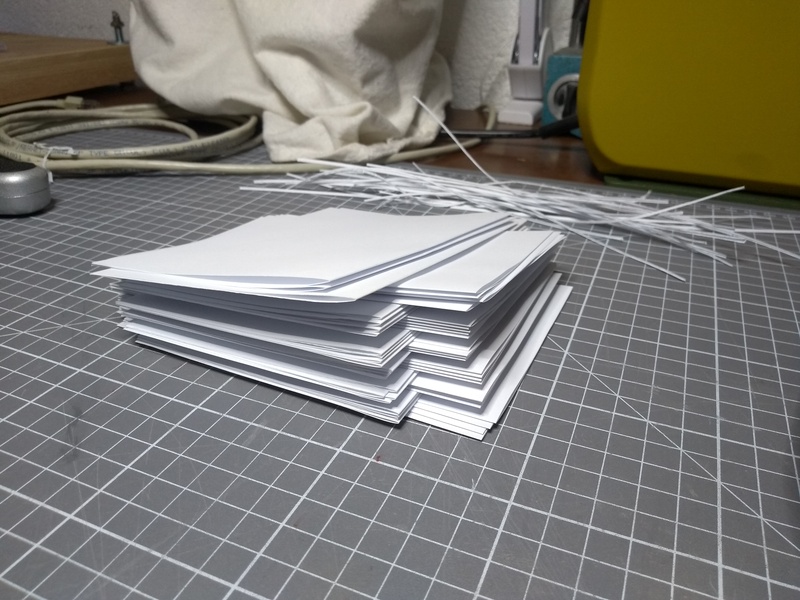
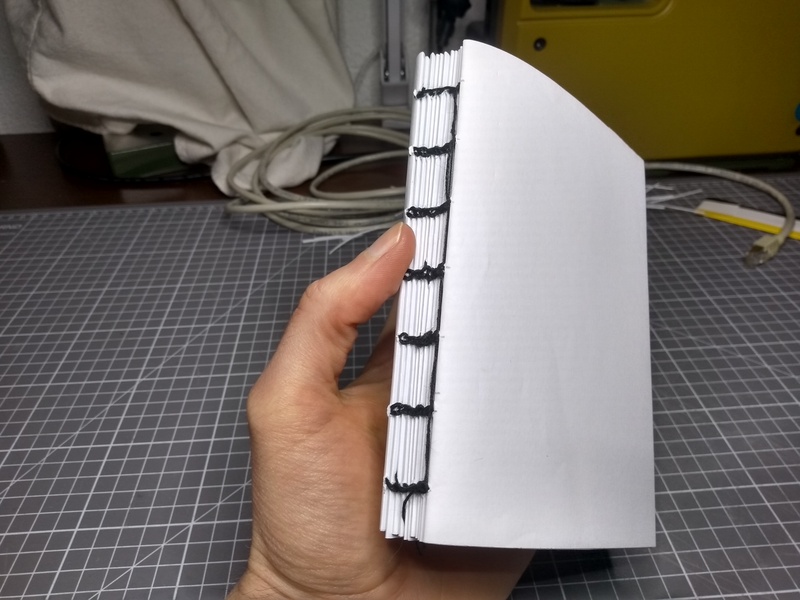
Making and preparing the signatures
Now I needed to needed to make the signatures. A signature is a group of 4 folded papers, nested within one another.
Yes, I work fast.
To create a text block, the signatures are sewn together. For that, I needed holes, so I marked the signatures where I wanted to make those.
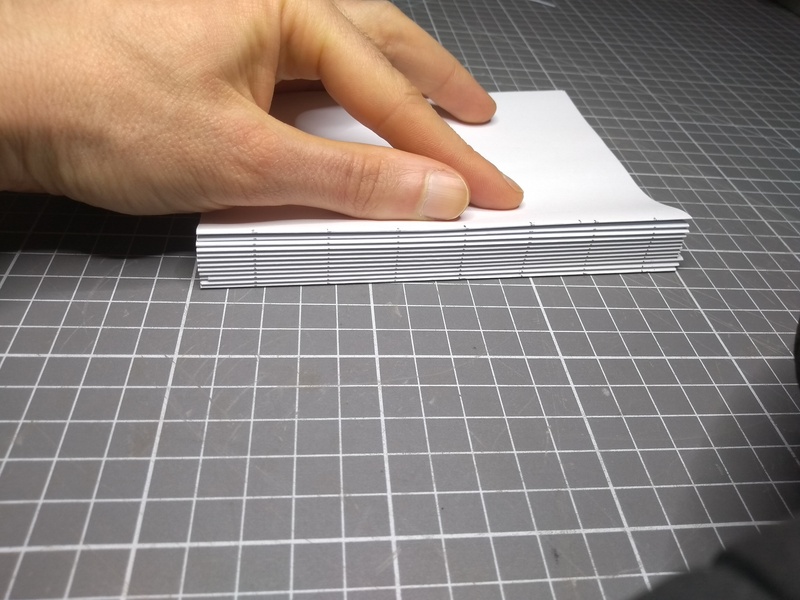
Making the holes with the awl was straight-forward.
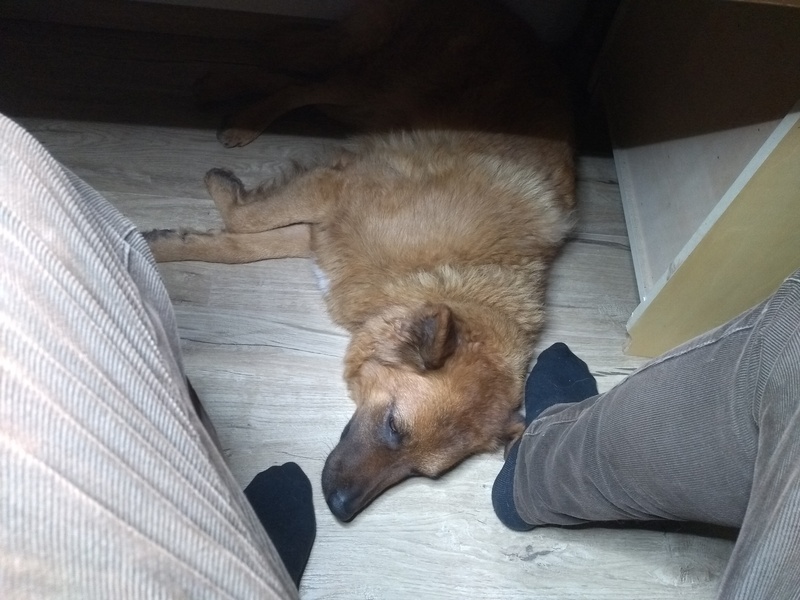
At this point, I spotted this rare and wondrous sight: a wild shop dog.
Sewing and glueing the text block
Next, I sewed the signatures together to make the text block.
Unfortunately I don't have any video from here on, but I did it exactly as shown in the video I followed.
I glued the text block using two coats of PVA glue.
Cover and finishing
This is where I went a bit off the rails. The Sea Lemon video shows adding an end page to each side, and a piece of paper to the spine. At least the piece of paper on the spine would have been a good idea for me too, as the signatures ended up moving. But more on that below.
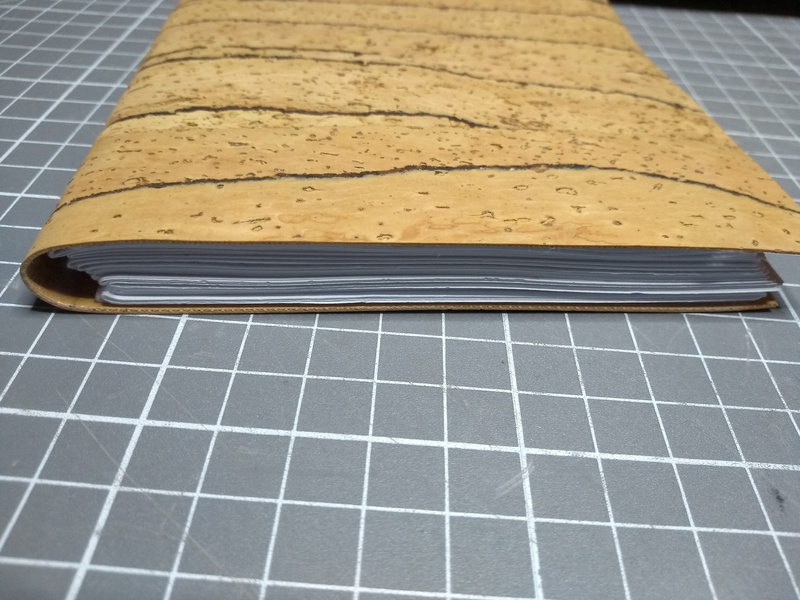
I just glued a piece of cork leather directly on the text block.
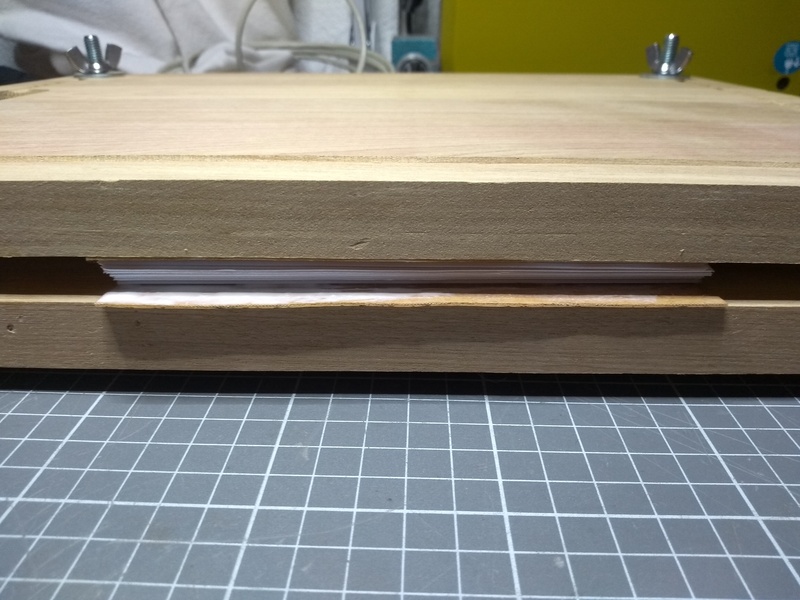
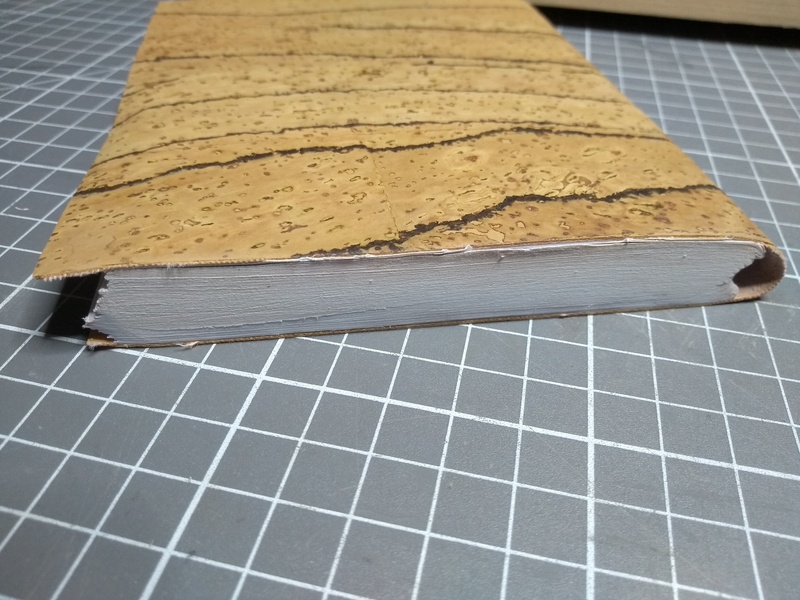
The glue-up resulted in the signatures moving, and a large gap forming between the spine and the cover.
This is the aspect of the build I'm least happy with. Next time, I'll definitely add a paper to stabilize the spine. Possibly, I'll also glue the cover in two stages, one side at a time. Having one half of the cover fixed might help with getting a tighter fit while positioning the other half.
To finish the notebook, all that was left to do at this point was to cut off some of the cover and paper along the edges, to get a smooth face. I used a combination square to cut a straight line, at a right angle to the spine.
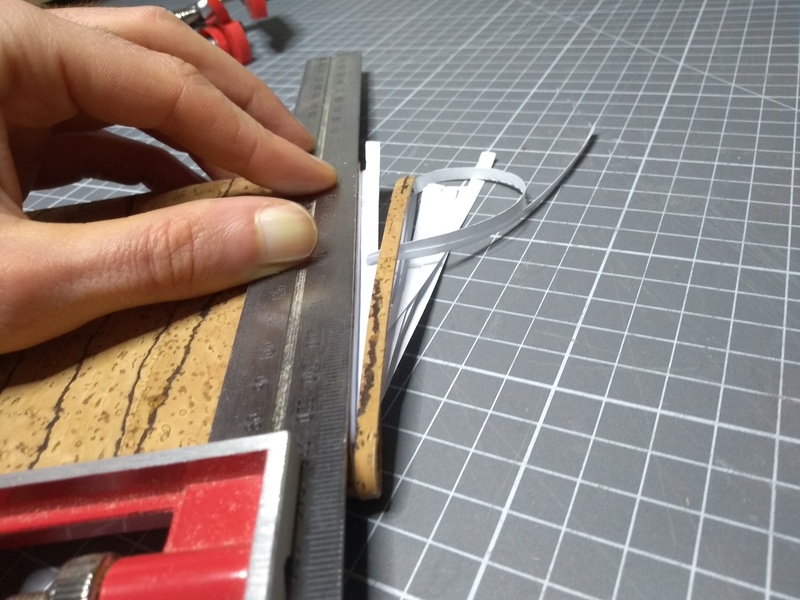
Unfortunately, whatever skill you have to acquire, or talent you have to be born with, to hold a knife upright while cutting along the straight line, I don't have it. This led to a result that was less than straight.
Fortunately, a bit of sand paper did the trick.
I started with a fine grid (120, I believe), but that didn't work very well. A coarser sandpaper (60, if memory serves) worked great.
The result still looked a bit ragged. Maybe this could be improved using another go with finer sandpaper, but I honestly like the rougher look. It's handmade, after all.
I repeated the cutting and sanding with the other sides, using the combination square to make sure all sides were roughly straight and square.
Conclusion
As I said in the beginning, I'm very happy with the result, especially for a first try. Although there are things I'd do differently, as explained above.
I already started using it, to sketch some ideas. Using a notebook I made myself is a nice feeling! At this point, I have no firm plans, but I'm pretty sure I'll make another one at some point.
